How to Configure a Local NTP Server
All programmable PLCs of the Merbon / Wall range have a real time clock which may be synchronized over the NTP protocol across the network.
- PLC mark220, mark220LX, mark320, mark320LX, markMX, markMX.2, markMX.3, IMIO105.2, IMIO110.2, ICIO205.2 use the standard cron Linux service, which is launched every 3 hours (at 12:15, 03:15, 06:15, etc.).
- PLC Wall (w750, wCIO, wMX) use NTPD, or NTP daemon – the service is thoroughly described here http://doc.ntp.org/4.1.0/ntpd.htm. In the PLC it is called with default parameters.
If the PLC has access to the Internet, the easiest way is using a public NTP server on the Internet, such as pool.ntp.org, see details at https://www.ntppool.org/en/use.html.

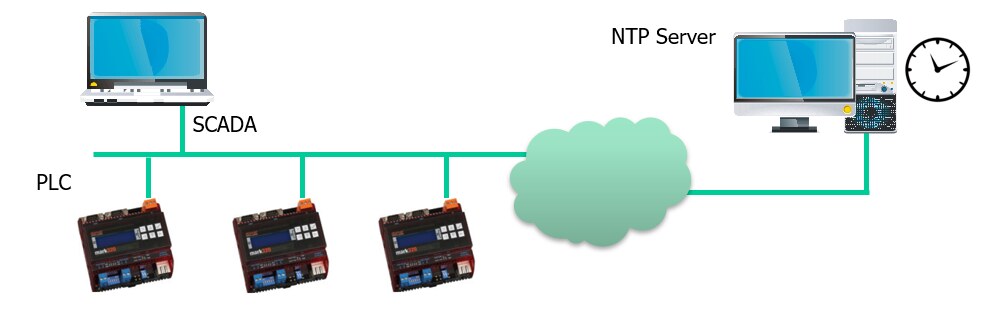
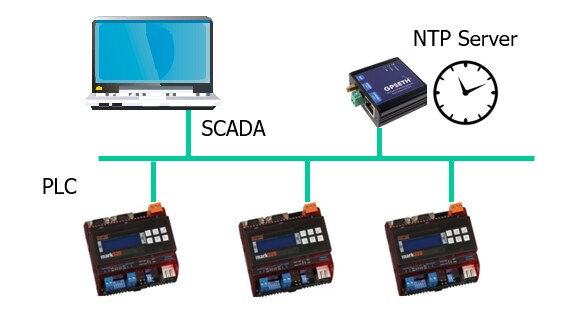
However, if the PLCs are operated in a local, closed network, a NTP server must be part of it. Mostly, a PC-based server or a separate hardware device (such as PaPouch GPSETH) is used, receiving the exact time from a GPS satellite service.
In case there is an extreme pressure on cutting costs, a simple time synchronisation with the local management station (SCADA PC) may be enough. Then, at least, all PLCs do have the same time as the management station. Of course the PC may be synchronized with a NTP server in the Internet, in case it has a separate network connection.
If you plan to use a local NTP server [1]:
- Check with your IT team. An NTP server may already have been provisioned.
- If an NTP server is not already available, create a Windows-based NTP server using the instructions on this page.
Check the Prerequisites
Prerequisites
- A Windows server running Windows 7, 8, or 10 is required.
(Note: Procedures listed on this page have been tested using Windows 10. Other Windows versions may have a slightly different workflow.
- You must have Administrator privileges to configure the Windows server.
- Requires a basic understanding of Windows registry. Caution should be used when updating the registry.
Configure the Windows Time Service
- In the File Explorer, navigate to: Control Panel\System and Security\Administrative Tools
- Double-click Services. This same task can be completed by entering services.msc in the Windows Run dialog (Windows Key + R).
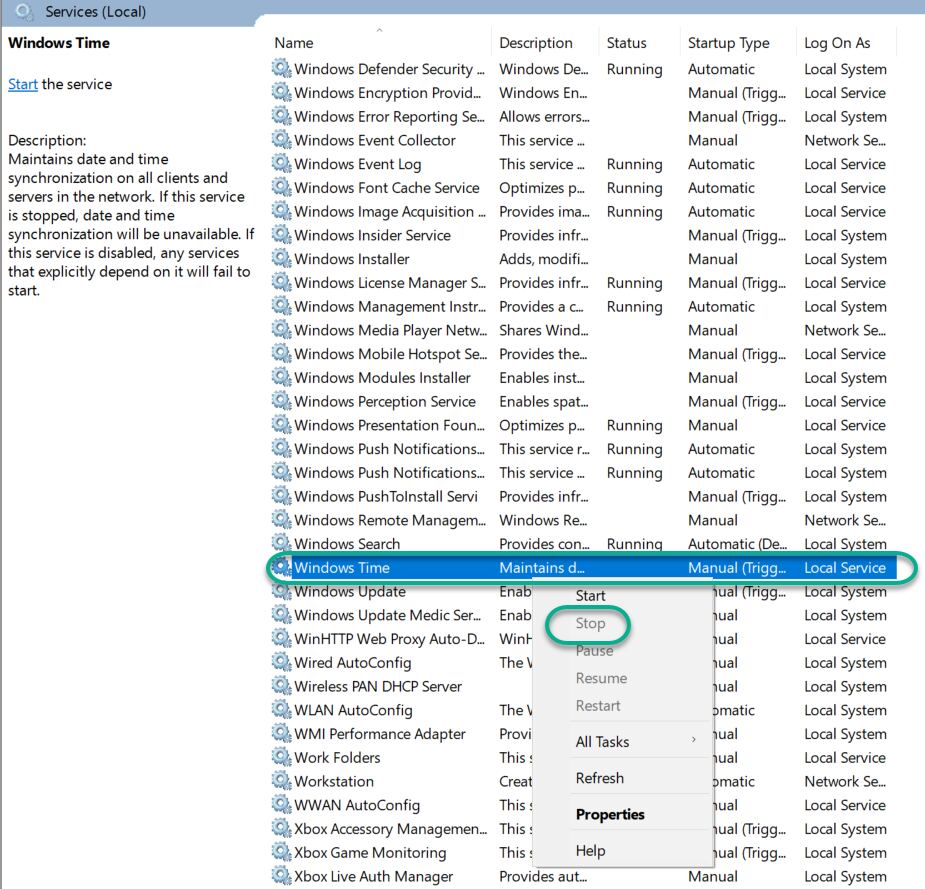
- In the Services list, right-click on Windows Time and click Stop.
Note: The Windows Time service may already be stopped. In this case, skip this step and go to the next step to Update the Windows Registry.
Update the Windows Registry to Create a Local NTP Service
- Launch Windows Run (Windows Key + R).
- Enter regedit and click OK.
- Navigate to the registry key: Computer\HKEY_LOCAL_MACHINE\SYSTEM\CurrentControlSet\Services\W32Time\Parameters
- If you do not see LocalNTP REG_DWORD in the list, create it using the following steps.
- Right-click in the Registry Editor, select New, select DWORD and enter LocalNTP (note that this name is case sensitive).
- Double-click LocalNTP, change the Value data to 1, select a Base of Hexadecimal , and click OK.
- Do not close the Registry Editor because it is used in the following steps.
Update the Windows Registry to Configure the Time Provider
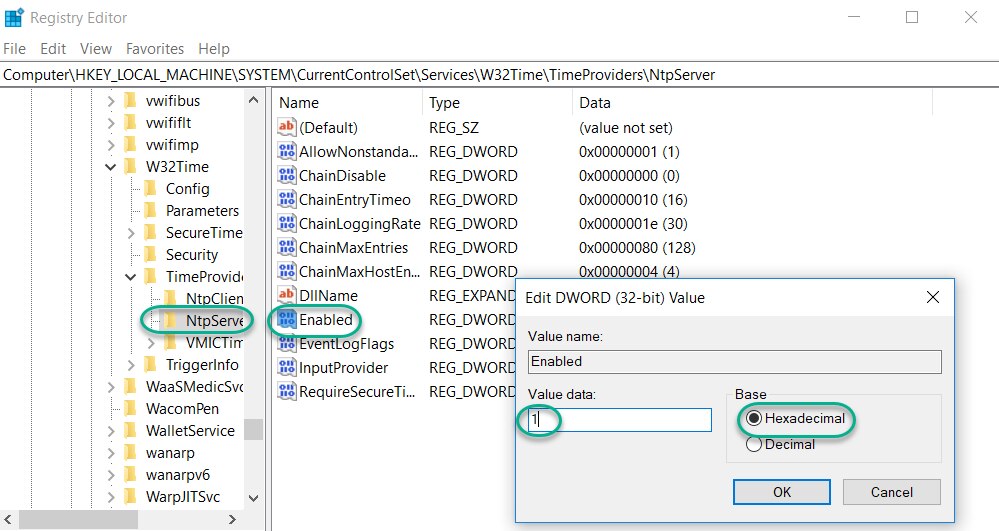
- Navigate to the registry key: Computer\HKEY_LOCAL_MACHINE\SYSTEM\CurrentControlSet\Services\W32Time\TimeProviders
- Select NtpServer, double-click Enabled, change the Value Data to 1, select a Base of Hexadecimal and click OK.
- Do not close the Registry Editor because it is used in the following steps.
Update the Windows Registry to Configure the Announce Flags
- Navigate to the registry key: Computer\HKEY_LOCAL_MACHINE\SYSTEM\CurrentControlSet\Services\W32Time\Config
- Double-click AnnounceFlags, change the Value data to 5, select a Base of Hexadecimal, and click OK.
- Close the Registry Editor.
Start the Local Windows NTP Time Service
- In the File Explorer, navigate to: Control Panel\System and Security\Administrative Tools
- Double-click Services.
- In the Services list, right-click on Windows Time and configure the following settings:
- Startup type: Automatic
- Service Status: Start
- OK
Finally, enable UDP port 123 on the Windows firewall for incoming connections.
- In Search find Firewall in Windows Defender…
- Go to Incoming rules
- In the right column, select New rule…
- Select the rule Port
- Enter UDP port 123 and click Next
- Select Allow connection and click Next
- Select all domains
- Enter the rule name, e.g. Local NTP server, and click Finish.
The local NTP Time Server configuration is now complete. You now can synchronize the time of other computers and devices on your local network.
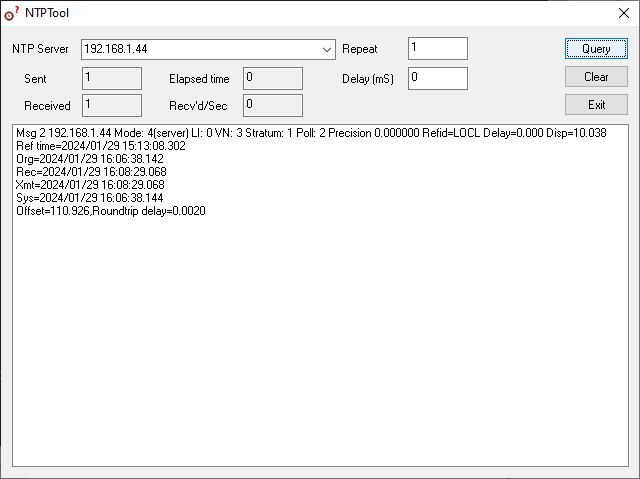
To test the server functionality from another PC (e.g. a service notebook) use for example the NTP Server Test Tool:
https://www.ntp-time-server.com/ntp-software/ntp-server-tool.html
[1]: https://techlibrary.hpe.com/docs/otlink-wo/How-to-Configure-a-Local-NTP-Server.html


